

Getting Started: Minimum Basic Setup Guide
Complete the 6 essential steps to get your Karo Simple business profile live, connect your review link, print your QR code, and populate your review library in under 30 minutes.
Important Note: Minimum Core Setup Only
This guide focuses strictly on the minimum required steps to get Karo Simple operational and ready for customer review scans. It intentionally skips advanced tools like individual employee tracking, deep conversion analytics, private feedback interception, add-on coin packages, or agency white-labelling. Once your basic setup is live and generating reviews, you can explore those power features at your own pace.
#Welcome to Karo Simple: Fast-Track Setup Overview
Getting started with Karo Simple is designed to be effortless, even if you have never used reputation management software before. In just 6 straightforward steps, you will establish your digital storefront, connect your Google Maps profile, print a branded QR standee for your billing desk, and stock your review library with authentic, high-converting suggestions.
Most business owners complete this entire setup in 15 to 30 minutes. Once finished, customers who visit your establishment can scan your QR code, pick an authentic review tailored to your service, and publish it to platform with a single tap.
#What You Will Have Ready After This Guide
By the time you complete this step-by-step tutorial, all foundational components of your reputation engine will be active and running:
- Verified Business Profile: Your official shop name, industry category, and location landmarks are saved in the system.
- AI Context & Keyword Engine: Trained with your specialties so generated reviews sound natural and trustworthy.
- Review Destination Link: Connected directly so scanning customers land instantly on your review form.
- Printable Counter QR Code: Downloaded in high-resolution format, ready to display at your reception or cash counter.
- Curated Review Library: Stocked with 10 to 15 pre-approved review templates across multiple ratings and styles.
- Multi-Lingual Review Landing Page: Configured in the local and regional languages your customers speak every day.
Pre-Flight Checklist Before You Begin
To finish the setup smoothly, keep these items handy: 1. Your Google Maps / Google Business Profile business or another platform where you want to take review. 2. A web browser on your computer or tablet. 3. A printer or nearby print shop to print your counter QR standee. 4. Estimated Time: 15 to 30 minutes.
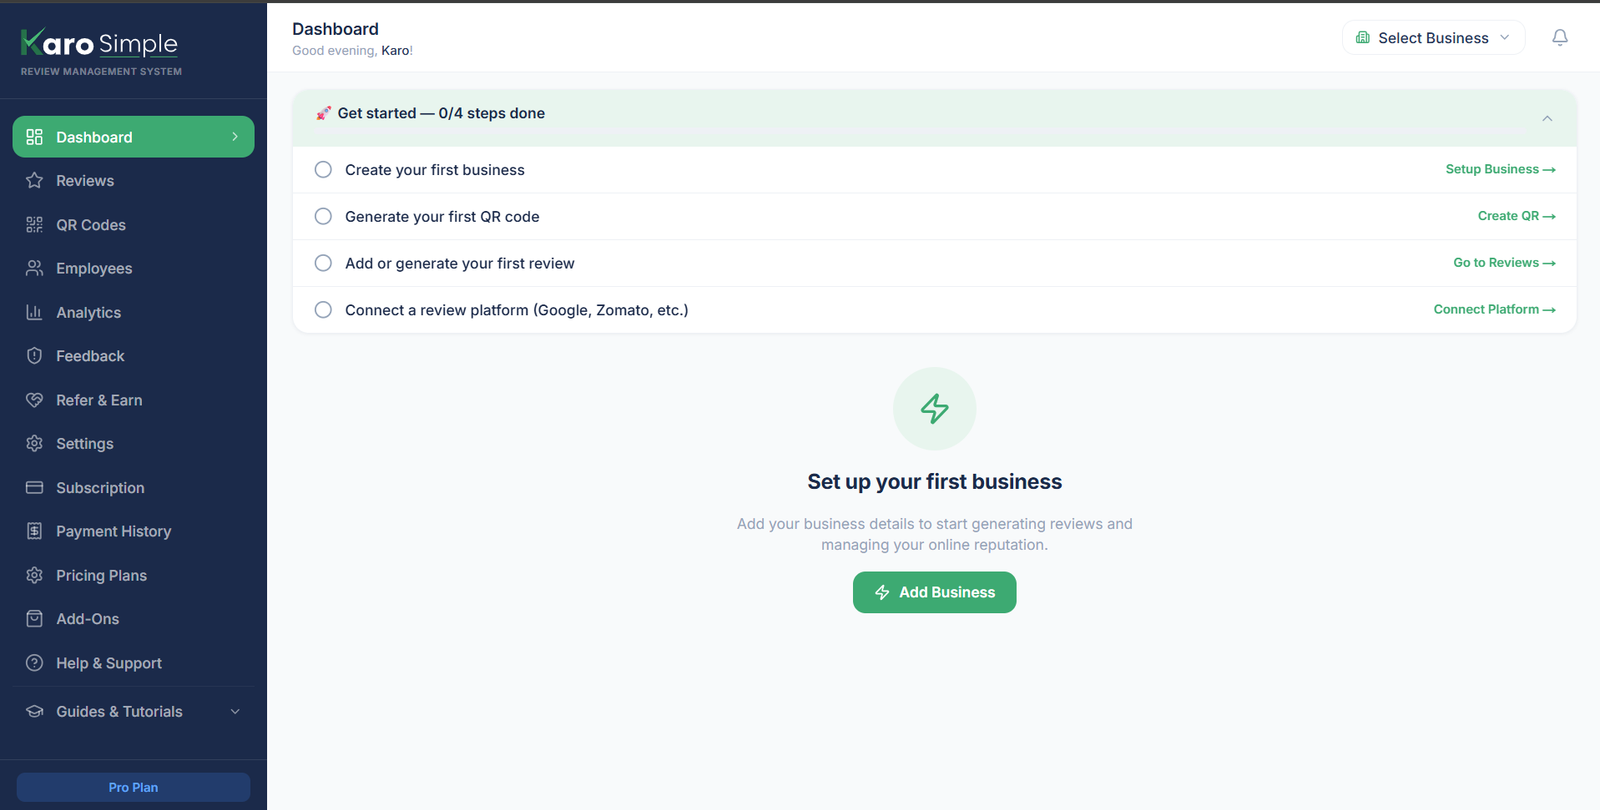
Create Your Business Profile
Log in to Karo Simple, navigate to Dashboard -> Settings -> Business Profile & Platforms (Tab 1), fill in your business identity details, and click Save Settings.
#Step 1: Create Your Business Profile
Your business profile forms the backbone of your entire Karo Simple account. It tells our system your business identity, your industry category, and your geographic location. Without saving this profile first, QR code generators and AI review engines cannot personalize content for your store.
Follow these detailed instructions to configure your profile:
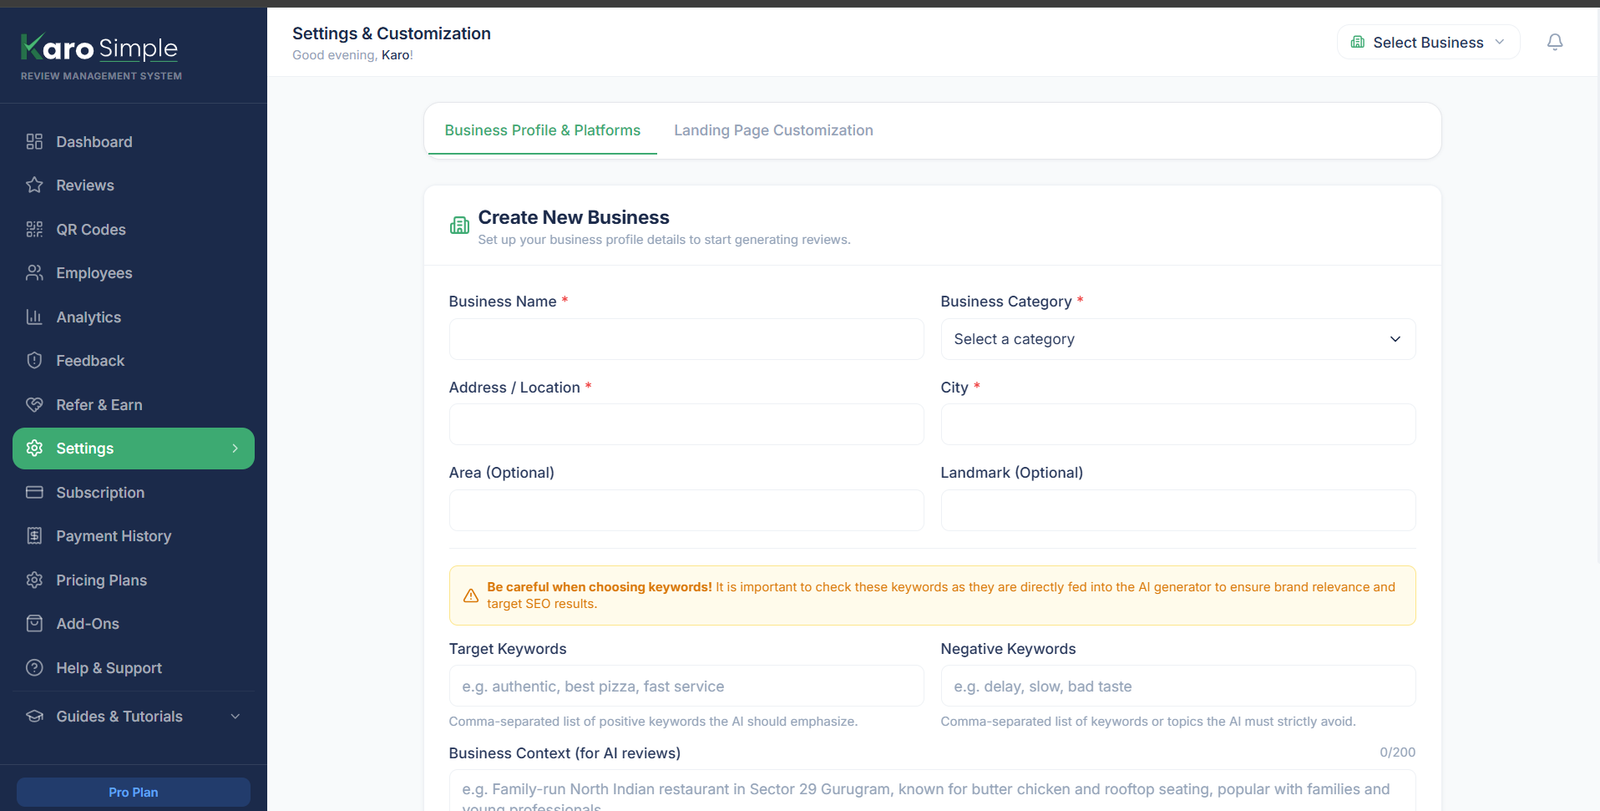
- 1. Access Settings: Log in to your account and go to Dashboard -> Settings -> Business Profile & Platforms (Tab 1).
- 2. Business Name (Required): Type your official business name exactly as it is recognized by customers and listed on Google Maps. Example:
Sharma Dental ClinicorRamesh Tyre House. - 3. Category (Required): Select the primary category that best matches your trade from the dropdown menu (e.g. Healthcare / Clinic, Restaurant / Cafe, Automotive, Retail Shop, Beauty Salon).
- 4. City (Required): Enter the city where your establishment operates (e.g. Jaipur, Pune, Nagpur, Mumbai).
- 5. Address / Area (Recommended): Add your street address, neighbourhood, or nearby landmark (e.g. Malviya Nagar, Near Metro Gate 2). This gives local context to review suggestions.
- 6. Save Your Changes: Click the primary "Save Settings" button at the bottom of the form.
Real-World Scenario: Ramesh Tyre House
Ramesh operates a tyre replacement and alignment workshop in Nagpur. In Tab 1, he sets: • Business Name: Ramesh Tyre House • Category: Automotive / Workshop • City: Nagpur • Address / Area: Sitabuldi Main Road, Opp Metro Station He clicks Save Settings and has his complete business identity registered in less than 2 minutes.
Add Your AI Context and Target Keywords
Enter 2 to 3 sentences in the AI Context box describing your specialties, and add comma-separated keywords to guide realistic review generation.
#Step 2: Add Your AI Context and Target Keywords
The Karo Simple AI engine produces authentic review suggestions for your customers. To make sure these reviews sound like genuine feedback from satisfied patrons rather than robotic marketing slogans, you must provide basic business context and target keywords.
Follow these steps to configure your review intelligence:
- 1. Locate the AI Context Section: On the same page (Settings -> Business Profile & Platforms), scroll to the AI Context card.
- 2. Write 2 to 3 Sentences in AI Context: Describe your core services, top strengths, and what customers love about you. Keep it under 200 characters in plain, natural language.
- Dental Clinic Example: "A friendly family dental clinic in Jaipur specializing in painless root canals, teeth whitening, and quick emergency tooth extraction. Trusted by 500+ happy families."
- Restaurant Example: "An authentic pure veg thali restaurant in Pune famous for fresh hot rotis, quick lunch service, and home-style Rajasthani spices."
- 3. Enter Target Keywords: Type specific phrases separated by commas that represent what you want mentioned on Google Reviews. For example:
painless treatment, affordable pricing, clean clinic, caring doctor, quick appointment. - 4. Save Configuration: Click "Save Settings" to lock in your AI instructions.
Why AI Context Matters: Authentic vs Generic Reviews
Without AI context, an AI model writes generic, unconvincing reviews like "Good service, highly recommended." With your custom context and keywords, it produces vivid, believable feedback like: "Visited Dr. Sharma for a root canal. The extraction was completely painless, the clinic is spotless, and the staff made me feel comfortable throughout. Best dental care in Malviya Nagar!"
Connect Your Google Review Link (Platform Setup)
Find your direct Google Maps review URL, paste it into the Platform Links section on Tab 1, and save your settings.
#Step 3: Connect Your Google Review Link (Platform Setup)
This step connects Karo Simple to your actual Google Maps listing. When a customer scans your QR code and selects an approved review, tapping the submit button will automatically open Google Maps directly on the review submission box with the text copied to their clipboard.
Follow this walkthrough to retrieve and link your direct Google Review URL:
- 1. Open Google Maps: Visit
maps.google.comon your browser and search for your verified business listing. - 2. Copy the Direct Link: Click on your business profile card, tap the "Share" button, and click "Copy Link". Alternatively, if you manage your Google Business Profile, click "Ask for reviews" and copy the short review URL.
Tip
For Google and all other platforms, always paste the direct review link that takes users straight to the review writing page. This ensures customers don’t get lost navigating menus and can immediately leave feedback, making the process faster and more effective.
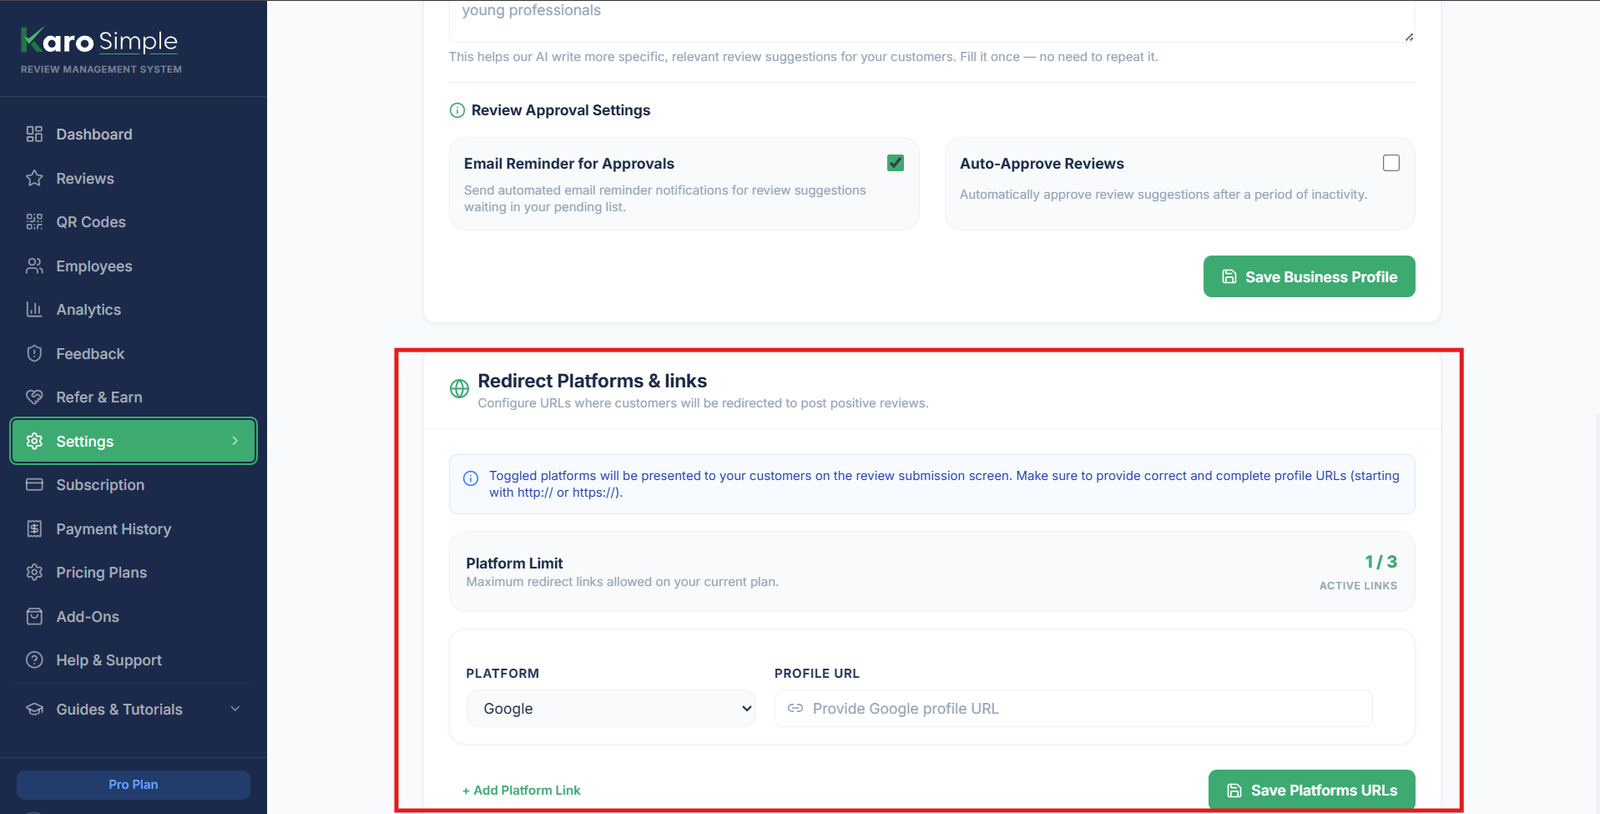
- 3. Paste into Karo Simple: In Karo Simple (Settings -> Business Profile & Platforms), scroll to Platform Links.
- 4. Select Platform: Choose Google from the dropdown, paste your copied link into the Link / URL field, and click "Save" on the platform row.
- 5. Click Save: Click the main "Save Platform URLS" button to finalize platform linking.
Platform Link Is Mandatory
At least one active platform link is required for your QR codes to function. If no platform link is configured, scanning the QR code will display a landing page with no destination action button, preventing customers from submitting their reviews.
Generate, Customize, and Print Your QR Code
Navigate to Dashboard -> QR Codes, create a new Business QR code, download the printable high-res PDF or PNG, and place it at your billing desk.
#Step 4: Generate, Customize, and Print Your QR Code
Now that your profile and Google link are active, it is time to create the physical bridge between your walk-in customers and your digital review page: your branded QR standee.
Follow these steps to generate and download your counter QR code:
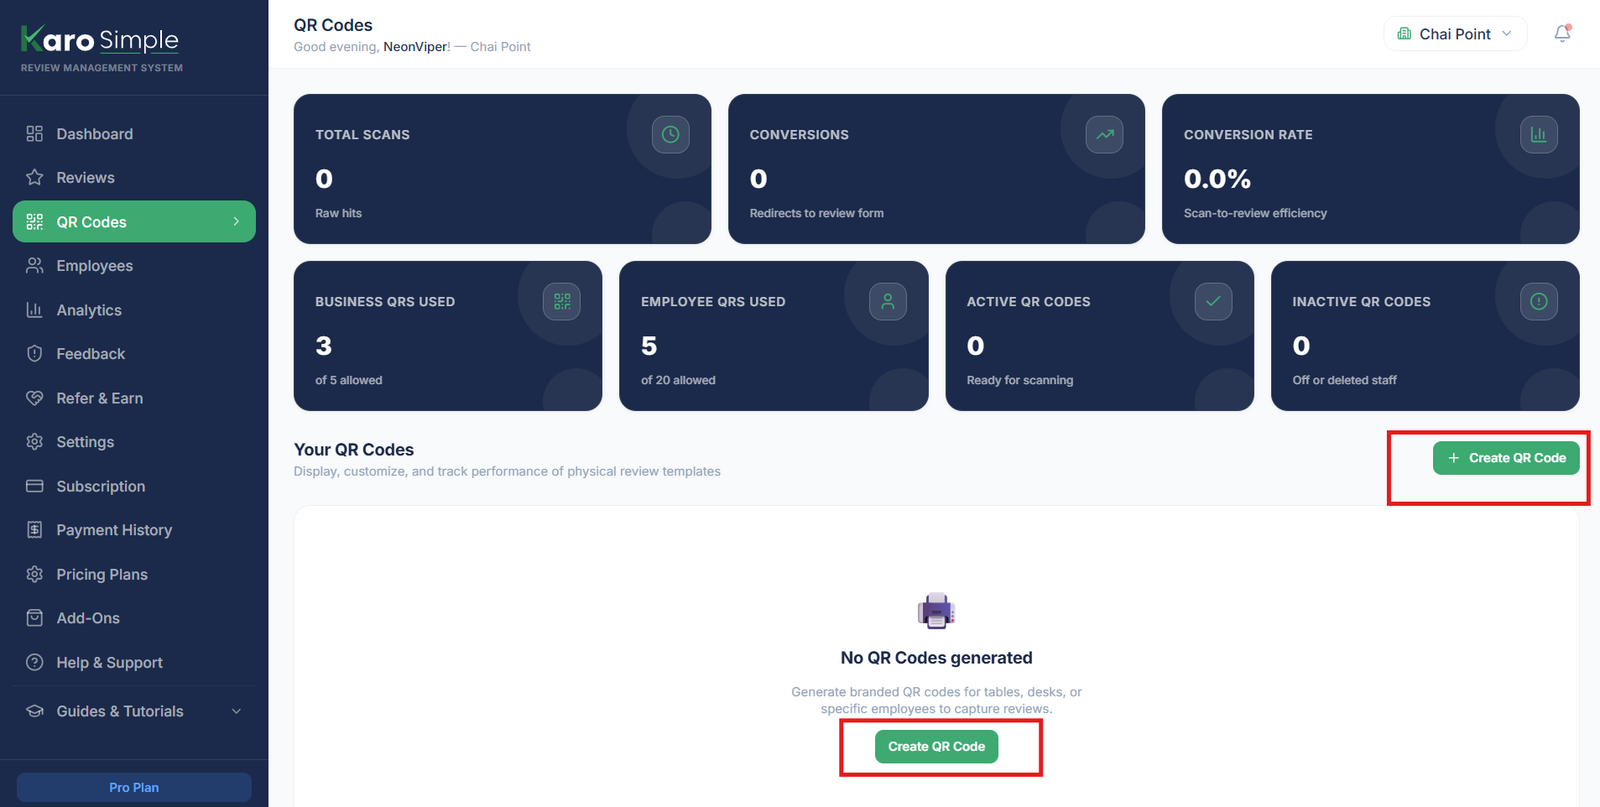
- 1. Go to QR Codes: In the left sidebar, click Dashboard -> QR Codes.
- 2. Click Create QR Code: Tap the prominent "+ Create QR Code" button in the top right corner.
- 3. Enter QR Details: Provide a clear name to identify the location (e.g.
Main Billing Counter,Reception Desk, orTable Standee 1). - 4. Select QR Type: Choose Business QR (the standard business-wide QR code for your establishment).
- 5. Click Generate: Click "Create" or "Generate". Your QR code is created instantly with a unique tracking identifier.
- 6. Download and Print: Click the Download button to save the file as a print-ready PDF or high-resolution PNG image. Print it on cardstock or slip it into an A5 acrylic stand.
Real-World Counter Setup: Sunita Beauty Salon
Sunita creates a QR code named "Front Desk". She downloads the A5 standee template, prints it in color, and places the acrylic holder right beside the UPI payment soundbox. When clients pay for their hair or spa treatment, Sunita smiles and invites them to scan the standee while their receipt is printing.
Pro Tip: Perform a Test Scan Before Bulk Printing
Always test-scan your newly printed QR code with your personal smartphone camera before ordering multiple standees. Confirm that your browser opens your branded landing page smoothly and that the Google Review link triggers correctly.
Populate Your Review Library with Approved Templates
Stock your library with 10 to 15 pre-approved review templates using the AI Review Generator or by importing manually.
#Step 5: Populate Your Review Library with Approved Templates
When customers scan your QR code, they do not want to stare at a blank box trying to formulate sentences. Your review library provides instant, one-tap suggestions. Having 10 to 15 diverse, high-quality reviews ready ensures that every customer finds an authentic compliment that resonates with their visit.
You can populate your review library using two fast methods:
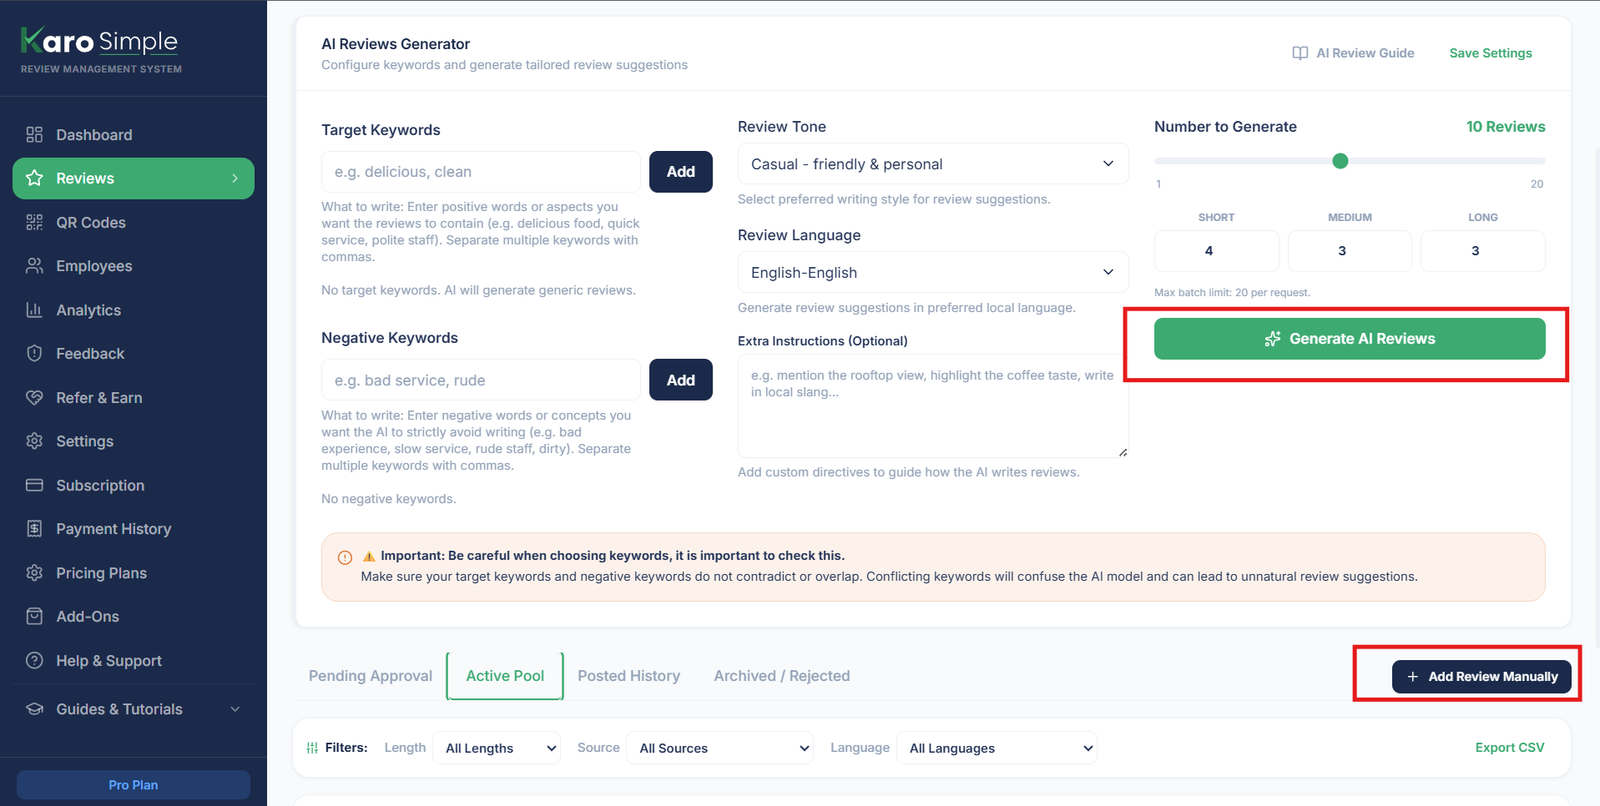
#Method A: Generate Reviews with AI (Fast & Automated)
- 1. Navigate to Reviews: In the sidebar, click Dashboard -> Reviews.
- 2. Open AI Generator: Click the "AI Review Generator" button in the top action bar.
- 3. Select Language : Choose your desired language (e.g. English, Hindi, Marathi).
- 4. Click Generate: The AI will craft multiple distinct review suggestions incorporating your business context and keywords.
- 5. Review and Approve: Read through the drafts. Click "Approve" to immediately add a suggestion to your live library, or Regenerate new variations.
- 6. Recommended Goal: Generate and approve at least 10 to 15 reviews spanning different lengths, highlights.
#Method B: Add Reviews Manually (Real Customer Feedback)
- 1. Click Add Review: On the Reviews page, click "+ Add Review Manually".
- 2. Enter Review Content: Write or paste an SEO‑friendly pre‑written review that you want your customers to post on the platform. Prepare structured review text that highlights your business strengths.
- 3. Click Add: Manually added reviews are automatically saved with APPROVED status(on active pool) and become live immediately.
Select Languages for Your Customer Landing Page
Go to Dashboard -> Settings -> Landing Page Customization (Tab 2), enable the languages your customers speak, and click Save Settings.
#Step 6: Select Languages for Your Customer Landing Page
When a customer scans your QR code, they arrive at your customized review page. Giving visitors the freedom to browse and post reviews in their mother tongue dramatically increases your review conversion rate.
Follow these instructions to configure language options:
- 1. Open Landing Page Settings: Go to Dashboard -> Settings -> Landing Page Customization (Tab 2).
- 2. Locate Available Languages: Scroll down to the Available Languages configuration matrix.
- 3. Enable Regional Languages: Toggle ON the languages commonly spoken by your walk-in clientele and click on the save configuration settings.
#Recommended configurations for Indian businesses:
- 1. English: Always keep enabled as the default universal language.
- 2. Hindi: Enable if a notable portion of your customers prefer Hindi.
- 3. Regional State Languages: Enable local languages such as Marathi, Gujarati, Bengali, Tamil, Telugu, Kannada, Odia, or Punjabi based on your store location.
- 4. Rule: Keep at Least One Active: Ensure at least 1 language is always enabled so the review portal loads reliably. Also upload or fill some reviews in the language you choose. If no reviews exist for that language, it will not appear in the dashboard. Taking care of this ensures your portal displays correctly and provides a smooth experience for both staff and customers.
- 5. Set Display Order: If multiple languages are enabled, arrange them so your primary language appears first on the customer screen.
- 6. Save Your Settings: Click "Save Settings" to publish your language preferences.
Real-World Scenario: Multi-Lingual Regional Setup
A boutique heritage hotel in Varanasi enables English, Hindi, and Bhojpuri to welcome travellers from across North India. Meanwhile, an orthopedic clinic in Chennai enables English and Tamil exclusively, ensuring local patients feel completely at home.
#You Are Now Live: Setup Verification Matrix
Congratulations! You have completed all 6 core onboarding steps. Your business reputation engine is officially live and ready to capture customer reviews.
Here is the complete status verification checklist for your account:
- Business Profile: Created, verified, and saved with industry and city context.
- AI Context & Keywords: Active and generating realistic, high-converting review suggestions.
- Google Review Link: Connected and validated to send customers directly to your Google Maps review form.
- QR Standee: Generated, downloaded, printed, and placed prominently at your front desk.
- Review Library: Stocked with 10 to 15 pre-approved, high-rating review templates.
- Landing Page Languages: Configured to support your local customer demographics.
The Customer Review Experience in 4 Quick Steps
When a customer scans your counter standee now, here is what happens: 1. Scan: Customer points their phone camera at your standee. 2. Language: Your branded landing page opens in their preferred language. 3. Choose: They tap an approved review template from your library (or edit words). 4.Tapping “Post” on Google or any other platform will open the respective review page with your pre‑written review text already copied. Customer just need to paste the review into the text box and click Submit — that’s it.
#What to Do Next: Power Features Roadmap
This guide covered the minimum setup needed to get your business operational. Once you are comfortable with basic review collection, explore these powerful tools to supercharge your results:
- Staff & Employee Attribution: Assign dedicated QR codes to individual waiters, technicians, or receptionists to track who earns the most 5-star reviews and reward top performers.
- Analytics & Scan Reports: Track real-time scans, review copy rates, and identify your highest-converting review templates and busiest hours.
- Negative Feedback Interception: Route 1-star to 3-star ratings to a private internal feedback form so you can resolve customer complaints privately before they hit platform.
- Landing Page Customization: Add custom brand colors, hero banners, social proof badges, and multi-platform review buttons (e.g. Justdial, Practo, TripAdvisor).
- Add-Ons & Top-Ups: Acquire additional AI generation credits, extra QR code slots, or automated review posting assistance using Karo Coins.
- Refer & Earn Program: Share your unique referral link with other business owners to earn bonus Karo Coins on every active business onboarding.
#Frequently Asked Questions (FAQ)
Was this guide helpful?
Help us keep our documentation accurate and easy to follow.
Configuring Your Business Profile, Location & AI Context
Set up your business name, category, localized address landmarks, and master AI context instructions to make generated reviews sound authentic.
Generating Smart Reviews with AI
Generate high-converting, realistic reviews using AI in 15+ languages with custom tones, positive and negative keywords, and tailored instructions.
Creating Your First Review QR Code
Learn what Karo Simple review QR codes are, how your customers use them, and how to create your first QR code in under 2 minutes.