

Onboarding Client Businesses
Add new client locations, configure AI review keywords, and link or create client login accounts.
#Rapid Client Onboarding
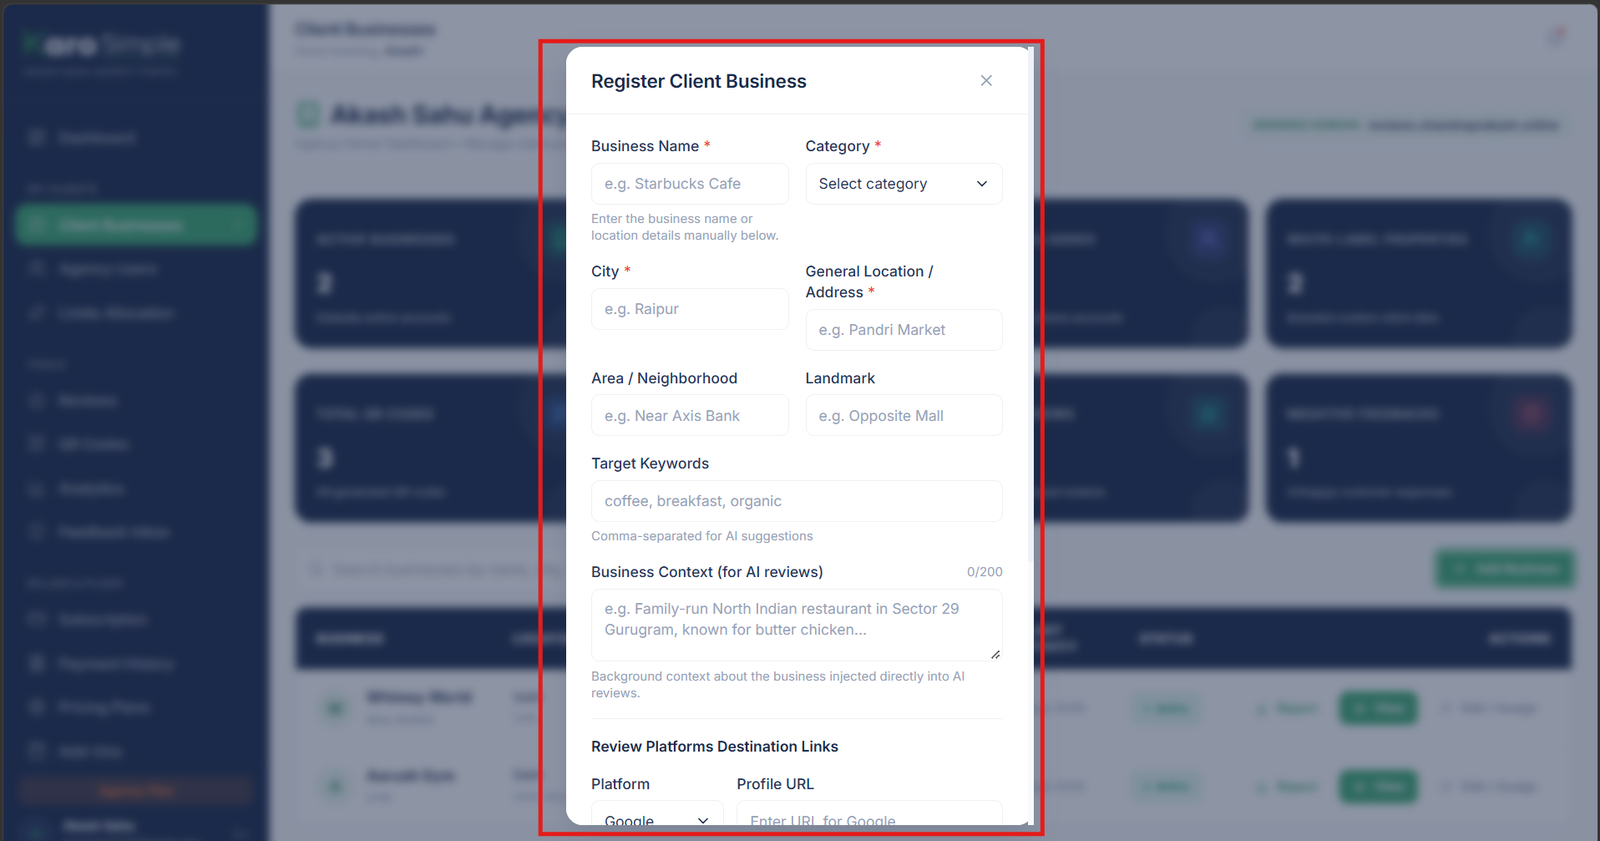
When onboarding a new client, agencies are required to fill in all details manually to ensure accuracy and control. This includes entering the business name and industry category, typing the full address with landmarks and neighborhood details, and providing the owner or client’s name and email address.
#Step-by-Step: Adding a New Client Business
Click "+ Add Business"
At the top right of the Client Businesses page, click the green "+ Add Business" button.
Business Name & Core Details Entry
In the Business Name field, agencies must type the client’s trade name and then continue filling in all required details. This includes entering the street address, city, area, and neighborhood coordinates, along with the primary review writing box link. Each field must be completed carefully to ensure accuracy, as these details form the foundation of the client’s profile setup. By filling in every element from business identity to review URLs agencies maintain full control over the onboarding process and ensure that each client record is complete and reliable.
Select Business Category & AI Context
Confirm the category (Restaurant, Salon, Clinic, Gym, etc.) and type 1 or 2 sentences into the AI Context box describing their specialty.
Add Target Keywords & Platform Links
Add positive keywords (e.g. "rooftop pool", "fast delivery") and secondary platforms like Zomato or Practo if applicable.
#The 3 Owner Assignment Options
At the bottom of the registration form, choose how you want to manage client access:
- 1. Agency Owned: Create the business profile immediately without attaching a client login. You can assign an owner later when the client is ready for onboarding.
- 2. Assign an Existing Agency User: If the client already has a registered user profile under your agency (for example, they own multiple branches), select their name from your user dropdown.
- 3. Create a New Client Account: Fill in the client's Name, Email address, and temporary Password. Karo Simple automatically creates their user login and attaches them as the official business owner in one click.

#Editing Details & Managing Active/Inactive Status
Need to update a client's details or pause services due to billing delays? Click the "Edit / Assign" button (two arrows icon) on any business row:
- Reassigning Owners: Switch the Assigned Owner dropdown to transfer management to another client contact.
- Toggling Active vs Inactive: Switch the "Active Status" toggle to OFF to deactivate the business. When inactive, customers scanning their QR codes will not reach an active landing page. All historical reviews, analytics, and settings remain completely safe.
- Instant Reactivation: Once the client settles their retainer invoice, toggle the status back to ON. Their QR codes resume functioning immediately without reprinting stands.


#Frequently Asked Questions
Was this agency guide helpful?
Help us improve agency workflows and onboarding guides.
Agency Overview KPIs & The Client Directory Table
Explore your agency control room: 8 portfolio-wide KPI summary cards, searching client records, and understanding directory table columns and badges.
Mastering Viewport Mode & White-Label PDF Client Reports
Step inside any client account with Viewport Mode to manage their QR codes and reviews directly, and download white-label PDF analytics reports.